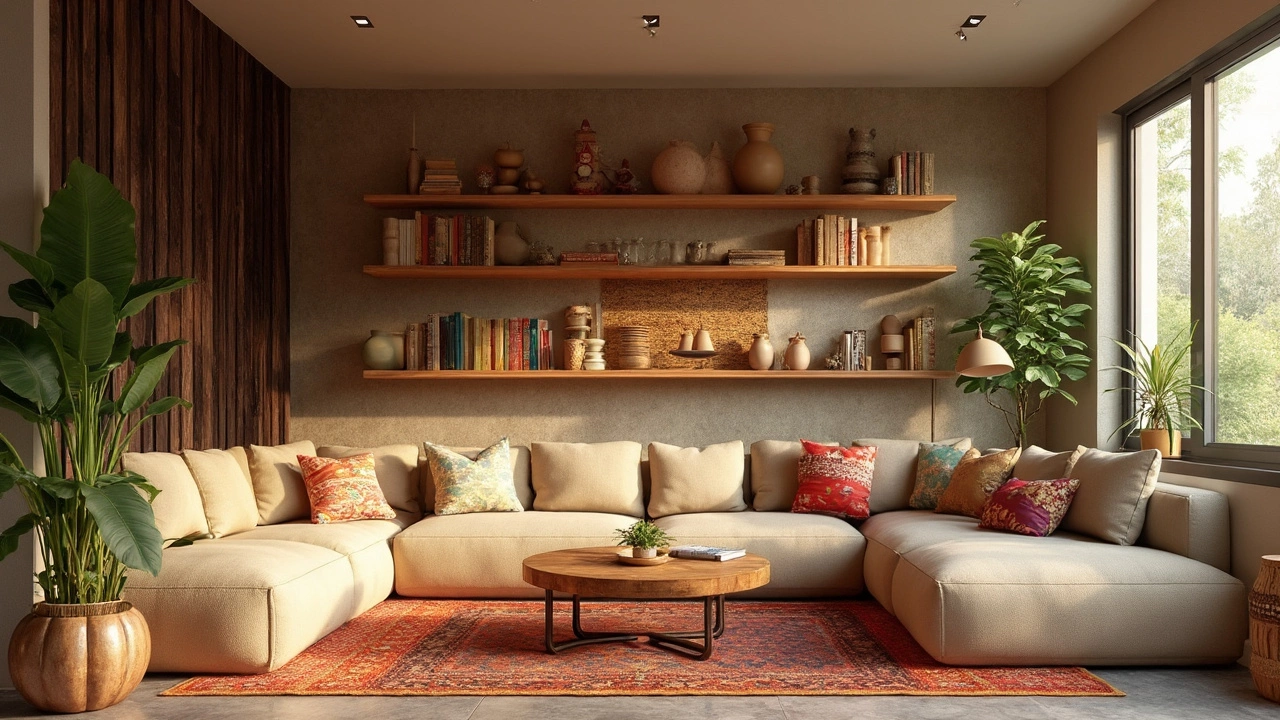
Floating Shelves – Smart Styling and Savings
Floating shelves are a quick way to add storage and style without taking up floor space. They look light, keep things tidy, and work in almost any room. If you’re wondering how to pick the right ones, how much they cost, or whether you should build them yourself, you’re in the right place.
Buy or Build: Which Saves More Money?
Most people start by checking online stores. Ready‑made floating shelves usually cost $15‑$50 per piece, depending on size and material. The price includes a bracket, but you still need a drill and anchors. If you love a hands‑on approach, DIY can be cheaper. A piece of 1‑inch MDF, a few brackets, and a coat of paint might run under $20 total.
The biggest savings come from reusing materials you already have. Old picture frames, reclaimed wood, or even thick cardboard can become sturdy shelves with a little sanding and a couple of brackets. The trade‑off is time – expect to spend an hour or two on cutting, sanding, and mounting.
Choosing the Right Material
MDF is popular because it’s cheap and easy to paint. It holds up well for light to medium loads, like books, plants, or décor. If you need extra strength, go for ¾‑inch plywood or solid wood. Plywood resists warping, but it’s a bit pricier. For a high‑gloss look, consider acrylic or glass shelves, though they cost more and need careful cleaning.
When you decide on a material, think about the wall type. Drywall can hold most floating shelves with the right anchors, but brick or concrete may need masonry bits and heavy-duty sleeves. A quick test: tap the wall with a screwdriver. If it feels solid, regular anchors work; if it’s loose, upgrade to toggle bolts.
Installation Made Simple
Start by measuring the exact spot you want the shelf. Use a level and a pencil to draw a straight line where the brackets will sit. Drill pilot holes, insert anchors, then screw the brackets in place. Slide the shelf onto the brackets and give it a gentle wiggle to make sure it’s stable.
If you’re hanging multiple shelves, use a laser level or a string line to keep everything aligned. It saves you from a crooked look that can ruin the clean vibe floating shelves aim for.
Once installed, add a coat of paint or a sealant if you used raw wood. This step protects the shelf from moisture and makes cleaning easier. A quick wipe with a damp cloth is enough for most finishes.
Styling Tips for Every Room
In the living room, use floating shelves to display a few books, a small plant, and a decorative bowl. Keep the arrangement balanced – group items in odd numbers and vary heights for visual interest. In the kitchen, short shelves can hold spices, mugs, or a cutting board, keeping countertops clear.
Bathrooms benefit from narrow floating shelves for towels or toiletries. Just make sure the brackets are rust‑proof; stainless steel or coated metal works best in humid spaces.
Remember, less is more. A cluttered shelf defeats the purpose of a clean, airy look. Choose a few statement pieces and let the shelf do the talking.
Floating shelves give you storage without bulk, and whether you buy or build, the payoff is a room that feels organized and stylish. Pick a material that fits your budget, follow a simple installation plan, and enjoy the instant upgrade.
Are Floating Shelves Dated? A Fresh Look at This Classic Storage Trend
Wondering if floating shelves have lost their spark? This article digs into whether floating shelves are dated or still going strong, sharing real-life tips on using them to upgrade your space. Get practical advice on design, installation, and making the most of these shelves no matter your decor style. We’ll also point out common mistakes and details that make floating shelves feel fresh in 2025. Perfect if you want to boost both your room's look and your storage game.
View More

Mar 27 2025